


, 3-Port Fast Compact Wall Charger for MacBook Pro/Air, Google Pixelbook, ThinkPad, Dell XPS, iPad Pro, Galaxy S22/S20, iPhone 13/Pro, and More")


In this article we will learn how to solve Could not lead module metadata in Android Studio.
“Could not load module metadata” problem may arise when the android studio couldn’t update all the dependencies. I also faced the same issue. So, now I will teach how to solve this “Could not load module metadata” problem.
Method 1:
Remove the caches
Step 1 : Open the terminal
Step 2 : paste cd C:\Users\USERNAME\.gradle\ (Navigate to .gradle folder)
Step 3 : rm -r caches\
Step 4 : Now clean or rebuild the project
Method 2:
- Goto gradle path which is given in error. like:
C:\Users\USERNAME\.gradle - Delete the whole gradle folder (
.gradlefolder) - Restart android studio and try to run now
If at 3. not working:
- After all this (after deleting
.gradle) uninstall android studio and reinstall it.
This worked for me.
Read more:
1. In-App Updates Implement
2. Custom Circle Button in Android Studio Step by Step
3. How to Vibrate Android device in Android Studio Programmatically
Method 3: Update dependencies
Go to file->project structure->dependencies
And make sure you update all the dependencies listed on the right side.
If it still pops out any issue delete the Gradle folder in the project and rebuild the project.
Method 4:
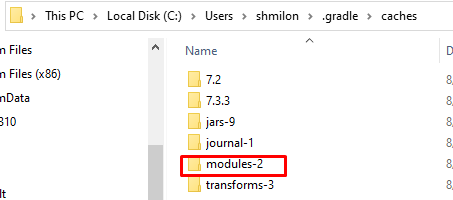
Just delete the “modules” folder like C:\Users\shmilon\.gradle\caches\modules in caches (no need to remove the entire cache folder) and do gradle clean build.
 If you have any questions, feel free to ask in the comments below. I try my best to respond to every comment that comes my way. If for any reason you don’t get a response, feel free to ask me on Twitter, or Facebook. If you want to follow me on those social media links as well to see different pictures and just talk about different things going on in the tech world.


